Design Dashboard Page
In this tutorial, we are going to learn how to design dashboard.
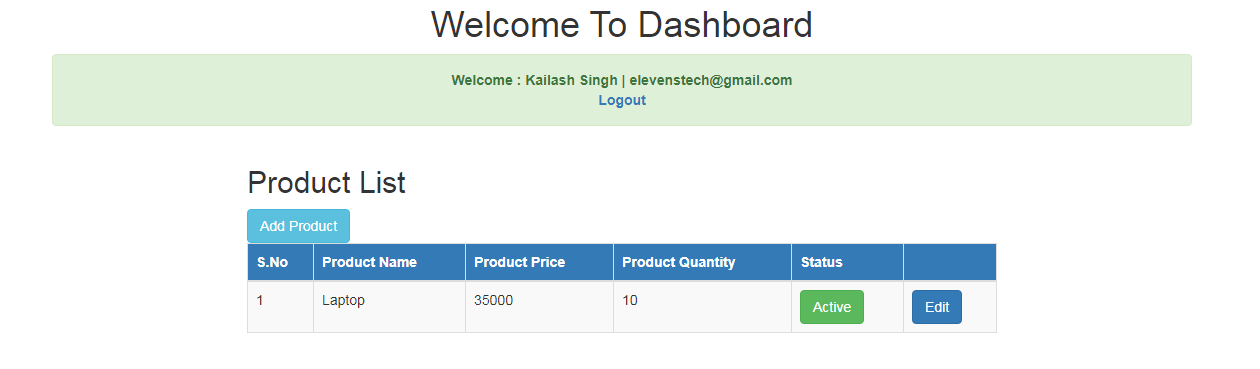
Step 1 : Open your dashboard page (successlogin.blade.php) and create design for product list.
Complete Code :
<!DOCTYPE html>
<html lang="en">
<head>
  <title>Dashboard</title>
  <meta charset="utf-8">
  <meta name="viewport" content="width=device-width, initial-scale=1">

<!-- Load bootstrap link -->
  <link rel="stylesheet" href="https://maxcdn.bootstrapcdn.com/bootstrap/3.4.1/css/bootstrap.min.css">
  <script src="https://ajax.googleapis.com/ajax/libs/jquery/3.5.1/jquery.min.js"></script>
  <script src="https://maxcdn.bootstrapcdn.com/bootstrap/3.4.1/js/bootstrap.min.js"></script>
</head>
<body>

<div class="container" style="margin-top: 20px;">
  <div class="row">
    <div class="col-sm-12">
    	<h1 style="text-align: center;">Welcome To Dashboard</h1>
      @if(isset(Auth::user()->email))
      <div class="alert alert-success success-block" style="text-align: center;">
        <strong>
             Welcome : {{ Auth::user()->name }} | {{ Auth::user()->email }}<br>
            <a href="{{url('/main/logout')}}">Logout</a>
        </strong>
      </div>
      @else
        <script>window.location="/main";</script>
      @endif
    </div>
  </div>
  <div class="row">
    <div class="col-sm-2"></div>
    <div class="col-sm-8">
      <h2>Product List</h2>

      <!-- Create button to add product -->
      <button class="btn btn-info add_product">Add Product</button>

      <!-- Product Table -->
      <table class="table table-striped table-bordered">
          <thead class="btn-primary">
            <tr>
              <th>S.No</th>
              <th>Product Name</th>
              <th>Product Price</th>
              <th>Product Quantity</th>
              <th>Status</th>
              <th></th>
            </tr>
          </thead>
          <tbody>
            <tr>
              <td>1</td>
              <td>Laptop</td>
              <td>35000</td>
              <td>10</td>
              <td>
                <a href="#" class="btn btn-success">Active</a>
              </td>
              <td>
                <a href="#" class="btn btn-primary">Edit</a>
              </td>
            </tr>
          </tbody>
      </table>
    </div>
    <div class="col-sm-2"></div>
  </div>
</div>

<!-- Open Modal Popup Code Start Here-->
<div id="add_modal_popup" class="modal fade" role="dialog">
  <div class="modal-dialog">
    <div class="modal-content">
      <div class="modal-header">
        <h4 class="modal-title">Add Product</h4>
      </div>
      <form method="post" action="#">
        {{csrf_field()}}
        <div class="modal-body">
          <label>Product Name : </label>
          <input type="text" class="form-control" name="product_name" required>
          <br>
          <label>Product Price : </label>
          <input type="text" class="form-control" name="product_price" required>
          <br>
          <label>Product Quantity : </label>
          <input type="text" class="form-control" name="product_quantity" required>
          <br>
          <label>Status : </label>
          <select name="status" class="form-control" required>
            <option value="">---Select Status---</option>
            <option value="1">Active</option>
            <option value="0">Inactive</option>
          </select>
        </div>
        <div class="modal-footer">
          <button type="button" class="btn btn-danger" data-dismiss="modal">Close</button>
          <button class="btn btn-success" type="submit">Save</button>
        </div>
      </form>
    </div>
  </div>
</div>
<!-- Open Modal Popup Code End Here-->


<script type="text/javascript">
  $(document).ready(function(){

      //Create jquery code to open modal popup
      $('.add_product').click(function(){
          $('#add_modal_popup').modal('show');
      });

  });
</script>
</body>
</html>
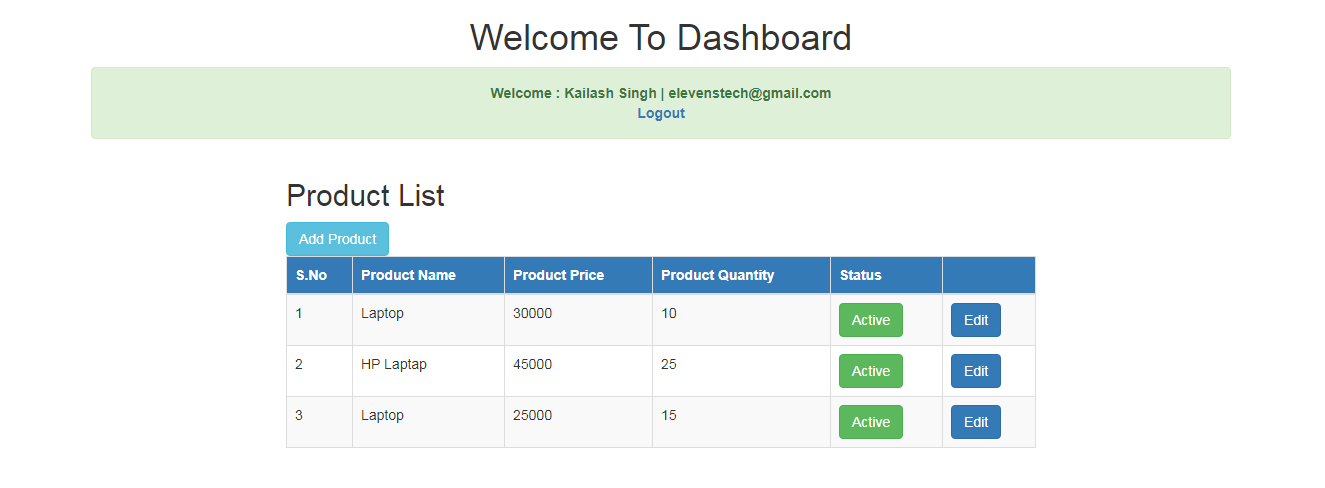
Result :
Source Code:
Small Laravel Project
In this project. We are providing you, how to create small project in Laravel....
Source CodeSEARCH POST HERE

 Click to Join