Add Product
In this tutorial, we are going to teach you, how to add product in database.
Step 1 : Create product table in database.
CREATE TABLE `laravel_project`.`product` ( `id` INT NOT NULL AUTO_INCREMENT , `user_id` VARCHAR(50) NOT NULL , `product_name` VARCHAR(300) NOT NULL , `product_price` VARCHAR(100) NOT NULL , `product_quantity` VARCHAR(100) NOT NULL , `status` ENUM('0','1') NOT NULL , `created_at` TIMESTAMP NOT NULL DEFAULT CURRENT_TIMESTAMP , `updated_at` TIMESTAMP NOT NULL DEFAULT CURRENT_TIMESTAMP , PRIMARY KEY (`id`)) ENGINE = InnoDB;
Step 2 : Open your dashboard page (successlogin.blade.php) and create add product form in modal popup.
<!-- Open Modal Popup Code Start Here-->
<div id="add_modal_popup" class="modal fade" role="dialog">
  <div class="modal-dialog">
    <div class="modal-content">
      <div class="modal-header">
        <h4 class="modal-title">Add Product</h4>
      </div>
      <!-- Add Product Form -->
      <form method="post" action="{{url('/add-product')}}">
        {{csrf_field()}}
        <div class="modal-body">
          <label>Product Name : </label>
          <input type="text" class="form-control" name="product_name" required>
          <br>
          <label>Product Price : </label>
          <input type="text" class="form-control" name="product_price" required>
          <br>
          <label>Product Quantity : </label>
          <input type="text" class="form-control" name="product_quantity" required>
          <br>
          <label>Status : </label>
          <select name="status" class="form-control" required>
            <option value="">---Select Status---</option>
            <option value="1">Active</option>
            <option value="0">Inactive</option>
          </select>
        </div>
        <div class="modal-footer">
          <button type="button" class="btn btn-danger" data-dismiss="modal">Close</button>
          <button class="btn btn-success" type="submit">Save</button>
        </div>
      </form>
    </div>
  </div>
</div>
<!-- Open Modal Popup Code End Here-->
Step 3 : Open your main controller ( MainController.php ) and create add product function so that we can save the product details.
function add_product(Request $request)
{
	//Get product details
	$values = array(
		'user_id' => Auth::user()->id,  //get user id from session
		'product_name' => $request->input('product_name'),
		'product_price' => $request->input('product_price'),
		'product_quantity' => $request->input('product_quantity'),
		'status' => $request->input('status')
	);

	// Insert prodcut details in product table
	DB::table('product')->insert($values);

	//back to success message
	return Redirect::back()->with('msg','Product added successfully.');
}
Step 4 : Now create a route in web.php for add product detail.
Route::post('/add-product','MainController@add_product');
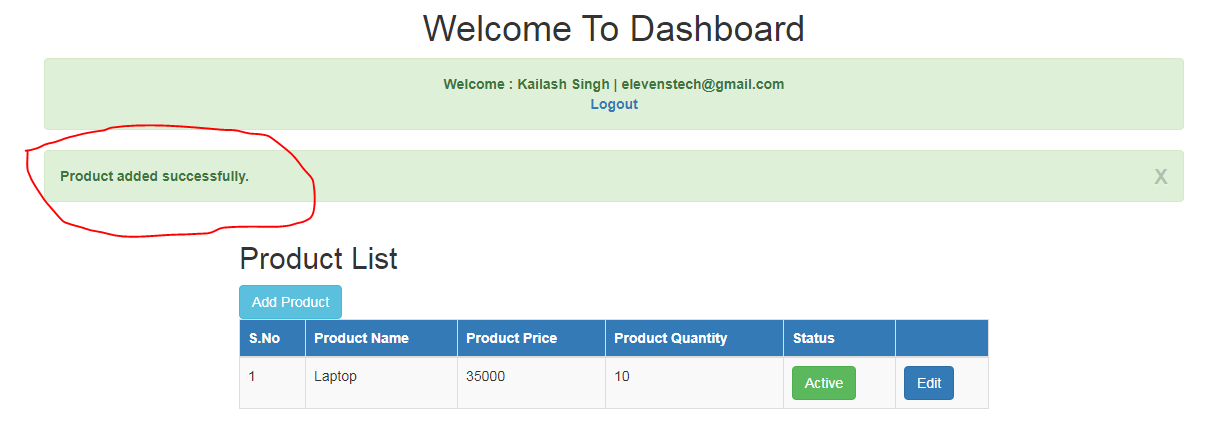
Step 5 : Create success message of add product in dashboard page (successlogin.blade.php) .
@if($message = Session::get('msg'))
  <div class="alert alert-success alert-block">
      <button type="button" class="close" data-dismiss="alert">X</button>
      <strong>{{$message}}</strong>
  </div>
@endif
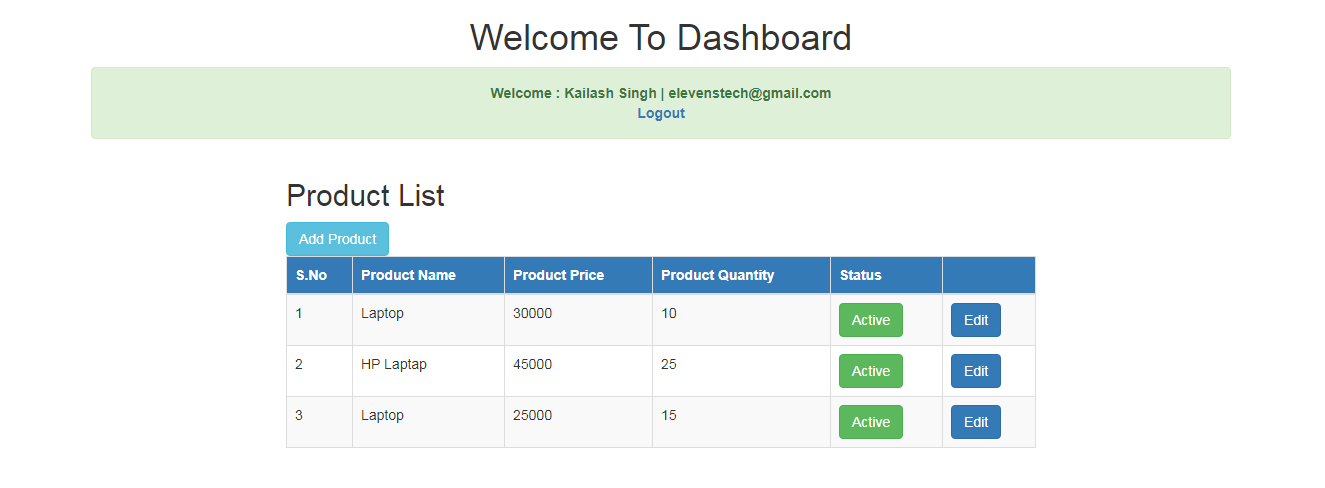
Result :
Source Code:
Small Laravel Project
In this project. We are providing you, how to create small project in Laravel....
Source CodeSEARCH POST HERE

 Click to Join