Active Inactive Status using Codeigniter
Active Inactive Status using Codeigniter
Published Nov 27,2019 by Kailash Singh
0 Comment 17625 Views
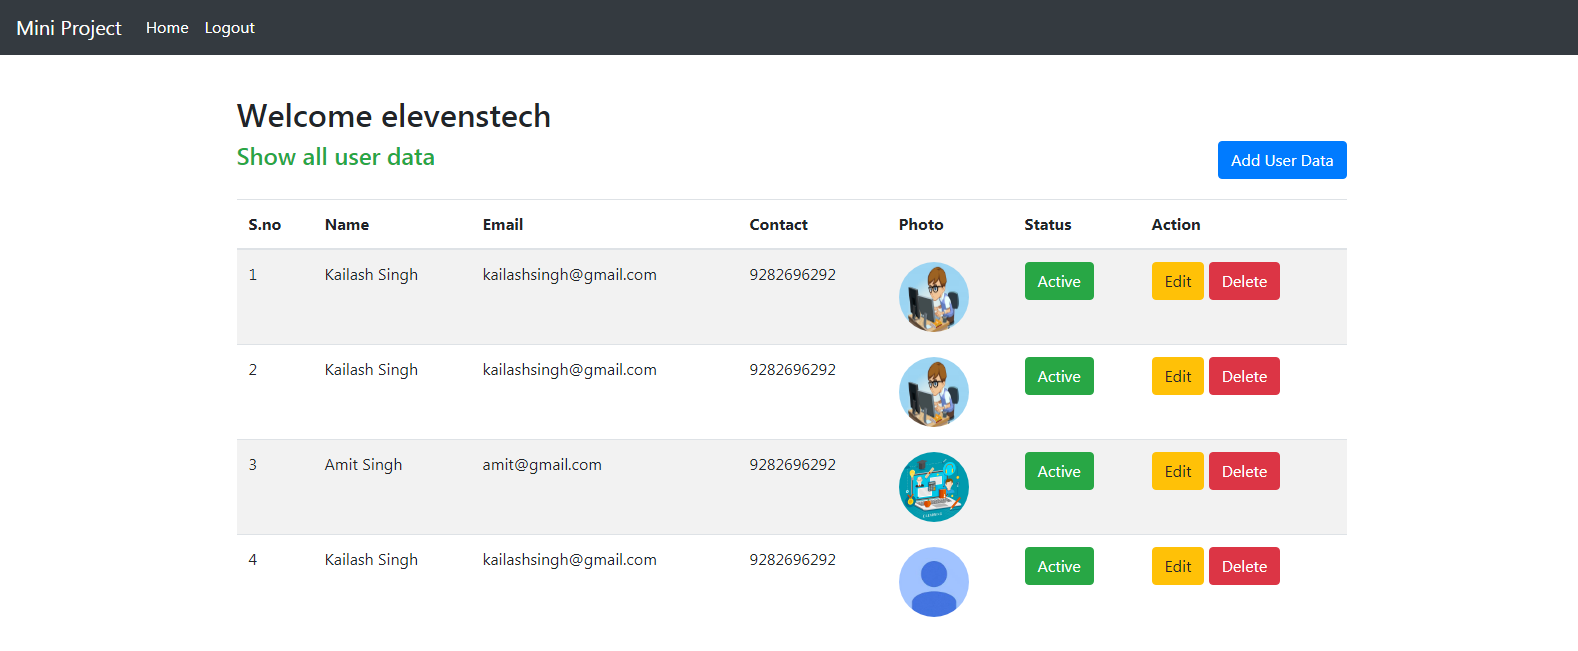
In this tutorial, we are going to learn about how to create active inactive user status using codeigniter.
Step 1:- Create table in database.
CREATE TABLE `codingmantra`.`users` ( `id` INT NOT NULL AUTO_INCREMENT , `name` VARCHAR(250) NOT NULL , `email` VARCHAR(250) NOT NULL , `phone` VARCHAR(100) NOT NULL , `status` ENUM('0','1') NOT NULL , `created_at` TIMESTAMP NOT NULL DEFAULT CURRENT_TIMESTAMP , PRIMARY KEY (`id`)) ENGINE = InnoDB;
Step 2:- Insert data in Users table.
INSERT INTO `users` (`id`, `name`, `email`, `phone`, `status`, `created_at`) VALUES (NULL, 'Hemant Sharma', '[email protected]', '9327867623', '1', CURRENT_TIMESTAMP), (NULL, 'Ranjeet Singh', '[email protected]', '9735663783', '1', CURRENT_TIMESTAMP), (NULL, 'Kailash Singh', '[email protected]', '9683683843', '1', CURRENT_TIMESTAMP);
Step 3: Create users controller in controller folder (Users.php)
With the help of this controller, we will pass all the data on the page .
<?php
defined('BASEPATH') OR exit('No direct script access allowed');

class Users extends CI_Controller {

	public function index()
	{
		$users_list = $this->db->select('*')->from('users')->order_by('id','desc')->get()->result(); //here i'm fetching the data form the table
		$this->load->view('users_list',['users_list'=>$users_list]);//load all data in view page
	}

}

?>
Step 4: Create users_list page in View folder (users_list.php)
First we will add link on this page
<link rel="stylesheet" href="https://maxcdn.bootstrapcdn.com/bootstrap/3.4.0/css/bootstrap.min.css">

<script src="https://ajax.googleapis.com/ajax/libs/jquery/3.4.1/jquery.min.js"></script>

<script src="https://maxcdn.bootstrapcdn.com/bootstrap/3.4.0/js/bootstrap.min.js"></script>
Then list all the users and then we will create two attributes (uid, ustatus) on the active & anctive button in which we will pass the id and status of the user.
Example :- <button class="btn btn-success user_status" uid="<?php echo $users->id; ?>" ustatus="<?php echo $users->status; ?>">Active</button>
<table class="table table-bordered table-striped">
  	<thead>
  		<tr class="btn-primary">
  			<th>S.no</th>
  			<th>Name</th>
  			<th>Email</th>
  			<th>Mobile</th>
  			<th>Status</th>
  		</tr>
  	</thead>
  	<tbody>
  		<?php
	  		$i = 1;
	  		foreach ($users_list as $users) {
  		?>
  		<tr>
  			<td><?php echo $i; ?></td>
  			<td><?php echo $users->name; ?></td>
  			<td><?php echo $users->email; ?></td>
  			<td><?php echo $users->phone; ?></td>
  			<td>
  				<?php if($users->status == '1'){ ?>

  					<button class="btn btn-success user_status" uid="<?php echo $users->id; ?>"  ustatus="<?php echo $users->status; ?>">Active</button>
                    //In these buttons we are creating an attribute and passing the values
  				<?php }else{ ?>

  					<button class="btn btn-primary user_status" uid="<?php echo $users->id; ?>"  ustatus="<?php echo $users->status; ?>">Inactive</button>

  				<?php } ?>
  			</td>
  		</tr>
  		<?php $i++; } ?>
  	</tbody>
</table>
Now we will create a jquery function and then we will take the value of button's attribute in it and then pass these values inside the modal popup with the help of ID's.
<script type="text/javascript">
	$(document).on('click','.user_status',function(){

		var id = $(this).attr('uid'); //get attribute value in variable
		var status = $(this).attr('ustatus'); //get attribute value in variable

		$('#user_id').val(id); //pass attribute value in ID
		$('#user_status').val(status);  //pass attribute value in ID

		$('#modal_popup').modal({backdrop: 'static', keyboard: true, show: true}); //show modal popup

	});
</script>
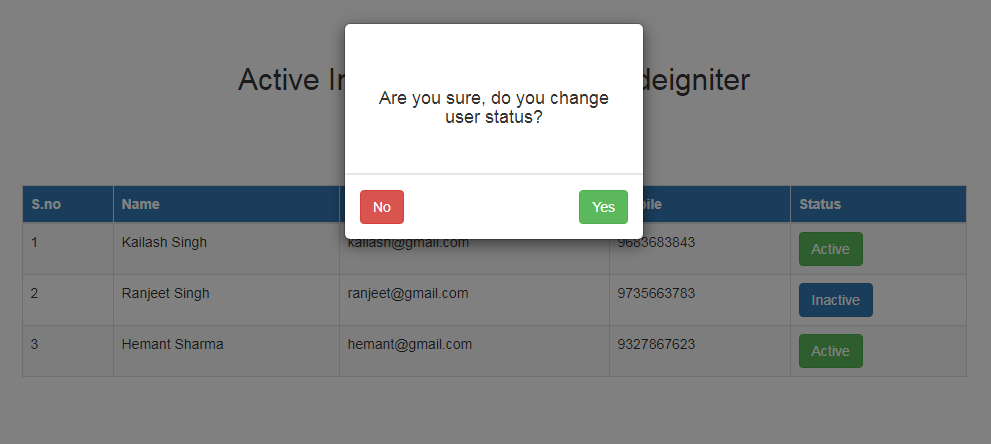
Now we will create confirmation modal popup to change status.
<div class="modal modal-danger fade" id="modal_popup">

    <div class="modal-dialog modal-sm">

        //create form to change user status
    	<form action="<?php echo base_url(); ?>users/user_status_changed" method="post">
	     	 <div class="modal-content">

		        <div class="modal-header" style="height: 150px;">

		          	<h4 style="margin-top: 50px;text-align: center;">Are you sure, do you change user status?</h4>

                   //getting value in hidden field with the hep of ID's
					<input type="hidden" name="id" id="user_id" value="">
					<input type="hidden" name="status" id="user_status" value="">

		        </div>

		        <div class="modal-footer">

		            <button type="button" class="btn btn-danger pull-left" data-dismiss="modal">No</button>

		            <button type="submit" name="submit" class="btn btn-success">Yes</button>

		        </div>

	        </div>

        </form>

    </div>

 </div>
Step 5: Create user_status_changed function in user controller (Users.php)
public function user_status_changed()
{
    //get hidden values in variables
	$id = $this->input->post('id');
	$status = $this->input->post('status');

    //check condition
	if($status == '1'){
		$user_status = '0';
	}
	else{
		$user_status = '1';
	}

	$data = array('status' => $user_status );

	$this->db->where('id',$id);
	$this->db->update('users', $data); //Update status here

    //Create success measage
	$this->session->set_flashdata('msg',"User status has been changed successfully.");
    $this->session->set_flashdata('msg_class','alert-success');

    return redirect('users');
}
Step 6:- Create success flash message in user view (users_list.php).
<?php if($error = $this->session->flashdata('msg')){ ?>

	 <h3 class="text-success"><?php echo  $error; ?></h3>

<?php } ?>
Hope this will help our developers.
Because we believe Mantra means CodingMantra
Comments ( 0 )
SEARCH POST HERE

 Click to Join