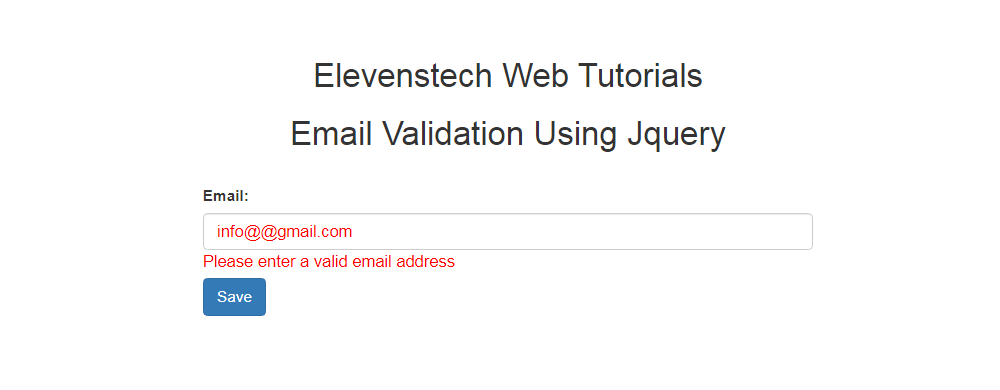
Email Validation Using Jquery
Email Validation Using Jquery
Published Feb 14,2021 by Kailash Singh
0 Comment 2507 Views
In this tutorial, we are providing you, how to create create email validation using JQuery.
How to use it:
We’re going to use the jQuery Validation Plugin to validate our form. The basic principle of this plugin is to specify validation rules and error messages for HTML elements in JavaScript.
Step 1: Include Bootstrap & jQuery Link .
<link rel="stylesheet" href="https://maxcdn.bootstrapcdn.com/bootstrap/3.4.0/css/bootstrap.min.css">

 <!--Here is JQuery Link -->
<script src="https://ajax.googleapis.com/ajax/libs/jquery/3.3.1/jquery.min.js"></script>
Step 2: Include the jQuery Validation Plugin.
<script src="https://cdn.jsdelivr.net/jquery.validation/1.15.1/jquery.validate.min.js"></script>
Step 3: Create the HTML Form.
In this form, we are creating a name of the form, so that we can validate the form with the help of this name.
Eg: <form name="emailform">
<form name="emailform">

  <div class="form-group">

    <label for="pwd">Email:</label>
    <input type="text" class="form-control" name="email" placeholder="Enter your email">

    <button type="submit" class="btn btn-primary">Save</button>

  </div>

</form>
Step 4: Create the Validation Rules.
<script>
  $(document).ready(function(){

     $("form[name='emailform']").validate({
            rules: {
                name:"required",
                  email: {
                         required: true,
                         email: true,
                         emailfull: true,
                  },
              },
                  messages: {
                             email: {
                                required: "Email is required",
                                email: "Please enter a valid email address",

                           },

                 },
              submitHandler: function(form) {
                form.submit();
              }
        });


      $.validator.addMethod("emailfull", function(value, element) {
            var pattern = new RegExp(/(^[-!#$%&'*+/=?^_`{}|~0-9A-Z]+(\.[-!#$%&'*+/=?^_`{}|~0-9A-Z]+)*|^"([\001-\010\013\014\016-\037!#-\[\]-\177]|\\[\001-\011\013\014\016-\177])*")@((?:[A-Z0-9](?:[A-Z0-9-]{0,61}[A-Z0-9])?\.)+(?:[A-Z]{2,6}\.?|[A-Z0-9-]{2,}\.?)$)|\[(25[0-5]|2[0-4]\d|[0-1]?\d?\d)(\.(25[0-5]|2[0-4]\d|[0-1]?\d?\d)){3}\]$/i);
                return this.optional(element) || pattern.test(value);
               }, "Please enter valid email address!");

  });
</script>
Step5: Create Error Message Style In Head Tag.
<style type="text/css">
   .error{
      color: red;
      font-size: 15px;
      font-weight: 400;
    }
</style>
Comments ( 0 )
SEARCH POST HERE

 Click to Join

![Unknown Collation [FIXED] : utf8mb4_0900_ai_ci In MYSQL](https://elevenstechwebtutorials.com/administrator/assets/content/1673553215.png)